Introduction to Smart Thermostats
Smart thermostats are innovative devices designed to manage home heating and cooling systems more effectively than their traditional counterparts. Unlike standard thermostats that simply offer basic temperature control, smart thermostats employ advanced technology to optimize energy usage by learning the homeowner’s behaviors and preferences. They are equipped with features such as programmable schedules, remote access via smart devices, and integration with other smart home energy systems.
The rising popularity of smart thermostat installation can be attributed to homeowners’ growing commitment to energy efficiency and sustainability. With increasing energy costs and the imperative to reduce environmental impact, the demand for energy saving thermostats has surged. These devices enable users to adapt their heating and cooling systems based on real-time data, promoting a more customized and efficient approach to home energy management.
Key benefits of smart thermostats include the ability to monitor and adjust the temperature remotely, leading to significant energy savings. Homeowners can set schedules that accommodate their routines and even modify them on-the-go through smartphone applications. This flexibility not only ensures comfort but also helps to avoid unnecessary energy consumption when the home is unoccupied. Furthermore, many smart thermostats come with learning algorithms that optimize HVAC performance, contributing to lower energy bills over time.
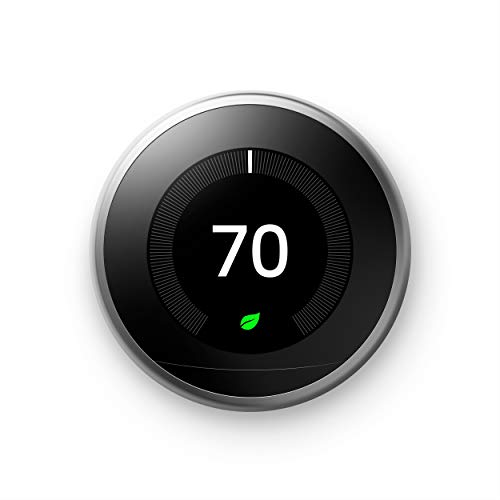
Additionally, the installation of smart thermostats is becoming more feasible through various DIY guides that simplify the process, making it accessible for many homeowners. As you delve further into this guide, you will discover practical steps on how to install a smart thermostat, including options such as Nest installation and other models. Understanding these functionalities is essential not only for the installation process but also for maximizing the benefits of your new energy-saving thermostat.
Why Upgrade to a Smart Thermostat?
Upgrading to a smart thermostat represents a significant advancement for homeowners aiming to enhance their energy efficiency. A traditional thermostat may adequately regulate your home’s temperature, but a smart thermostat installation provides more personalized control, optimizing your heating and cooling systems. One of the primary benefits of a smart home energy system is the ability to monitor and adjust your home’s climate remotely through smartphone applications. This feature allows homeowners to make real-time changes, regardless of their location, contributing to greater comfort and energy savings.
Another compelling advantage of smart thermostats is their scheduling capabilities. Many models enable you to create customized heating and cooling schedules that align with your daily routines. As a result, you can maintain comfortable temperatures when at home while reducing energy consumption during off-peak hours. Implementing such a system can be viewed as an HVAC upgrade that not only enhances convenience but also encourages responsible energy use.
Notably, investing in an energy-saving thermostat can lead to substantial long-term cost savings on energy bills. Studies indicate that homeowners transitioning to smart thermostats often experience a reduction in energy usage of up to 15%. The immediate feedback provided by these devices also assists in identifying habits that may contribute to higher energy consumption, allowing for smarter choices to be made.
Furthermore, many smart thermostats offer integration with existing smart home systems, making them versatile additions to your home technology. For instance, the popular Nest installation not only regulates temperature but can also interact with various devices, enhancing the overall efficiency of the home. With all these features, it’s evident that switching to a smart thermostat is a proactive step toward optimizing temperature management while achieving considerable financial benefits.
Choosing the Right Smart Thermostat for Your HVAC System
When considering a smart thermostat installation, one of the most crucial initial steps is selecting a model that is compatible with your existing heating, ventilation, and air conditioning (HVAC) system. Not all smart thermostats are designed to operate seamlessly with every type of HVAC system; thus, it is imperative to evaluate the specifications and features of both the thermostat and your HVAC setup before proceeding.
First, identify the type of HVAC system you have. Common types include central heating systems, boilers, heat pumps, and zoned heating and cooling systems. Many manufacturers provide detailed compatibility lists for their smart thermostats, ensuring users can make informed choices based on their specific requirements. Checking this compatibility will help avoid potential issues during installation and afterwards.
Next, consider the features offered by various models. Some energy saving thermostats boast advanced functionalities such as learning capabilities, remote access through mobile applications, and integration with other smart home energy systems. For instance, models like the Nest installation offer features that adapt to user habits, potentially leading to significant savings on energy bills. In contrast, simpler DIY thermostat options may offer basic programming functions without the added complexity.
User preferences and budget also play essential roles in the decision-making process. Determine how much you are willing to invest, as smart thermostats can vary significantly in price. While some premium models provide extensive compatibility and features, more affordable options may still deliver excellent HVAC performance without the bells and whistles. Ultimately, assess your requirements and choose a model that balances features, compatibility, and cost.
By following these guidelines, you can ensure a successful smart thermostat installation that enhances both the efficiency of your HVAC system and your overall home energy management.


Preparing for Installation
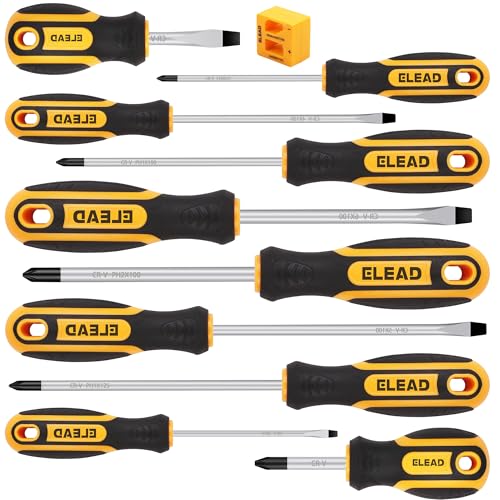
Before embarking on the smart thermostat installation process, it is crucial to undertake thorough preparation to ensure a successful and safe experience. Begin by gathering the necessary tools, which typically include a screwdriver, a drill, wire strippers, and a voltage tester. These tools will facilitate the installation of your energy-saving thermostat and ensure that you have everything on hand to avoid any interruptions during the process.


Safety should be a top priority before proceeding with the installation. To prevent any electrical hazards, it is essential to turn off the HVAC system. Locate the circuit breaker that powers your heating and cooling systems and switch it off. This precaution will not only safeguard you from potential electric shock but also protect your system from damage during the installation process. Additionally, using a voltage tester will help confirm that there is no active power in the wires you will be working with.
Furthermore, it is important to assess the existing wiring of your HVAC system to ensure compatibility with the new smart thermostat. Many modern smart thermostats require a common wire (C-wire) for proper functioning. If your existing wires do not include a C-wire, you may need to consider alternative wiring options or consult a professional for assistance. Familiarizing yourself with your HVAC setup will help you determine whether a DIY thermostat installation is feasible or if an HVAC upgrade might be necessary.


As you prepare for installation, take the time to review the user manual and installation instructions provided with your new device. Understanding how to install smart thermostat features correctly will enhance your experience and maximize the benefits of your smart home energy management system. Proper preparation sets the stage for a seamless installation and paves the way for enjoying the long-term advantages of a smart thermostat.
Removing the Old Thermostat
Before beginning the installation of a new energy-saving thermostat, it is crucial to safely remove the old thermostat from its mounting place. This process can be completed effectively with careful handling and by following a systematic approach. Start by turning off the power to your HVAC system at the circuit breaker. This step is vital to ensure safety, eliminating the risk of electric shock during the removal process.
Next, take a moment to document the existing wiring setup. This is particularly important for homeowners who are undertaking a DIY thermostat installation for the first time. Using your smartphone, take clear pictures of the wiring connections as they are currently configured. Label each wire according to its terminal designation, which will aid you in making a proper connection once you install the new thermostat. Typically, you will find wires labeled for various functions such as heating, cooling, and power.
Once you have documented the wiring, it’s time to remove the old unit. Begin by unscrewing any mounting screws or brackets that are holding the thermostat in place. After all screws have been removed, gently pull the thermostat away from the wall. Take care not to disconnect the wires just yet; keep them secure to avoid confusion later on. If you encounter any difficulty dislodging the old unit, double-check for any remaining screws that may not be obvious at first glance.
Finally, with the old thermostat detached, ensure that the wires are not frayed or damaged. This step will prevent complications when you connect them to the smart thermostat during installation. Once you complete this phase, you are now prepared to proceed with the installation of an advanced smart home energy system, and the benefits it can offer in terms of energy conservation and efficient HVAC upgrades will soon follow.
Installing the New Smart Thermostat
When considering a smart thermostat installation, it is essential to follow a precise step-by-step process to ensure a successful and efficient setup. Start by gathering the necessary tools, including a screwdriver, drill, and a level, as well as your energy-saving thermostat of choice. Begin your installation by turning off the power to your HVAC system at the circuit breaker. This step is crucial for safety and protecting your equipment.
Next, remove the old thermostat from the wall. Carefully note the wiring and take a picture for reference, particularly if you are transitioning from a traditional unit to a smart home energy solution. Disconnect the wires from the existing thermostat, marking each wire with tape to indicate its corresponding terminal, which will help during the smart thermostat installation process.
With the old unit removed, attach the new smart thermostat base to the wall. Use a level to ensure that it is mounted straight and secure it with screws. Then, re-attach the wires to the new thermostat base according to the labeling from the previous unit and the manufacturer’s guidelines. This may include connecting terminal labels such as R, W, Y, and G, depending on your system’s configuration.
After connecting the wires, attach the thermostat face to the wall-mounted base. Ensure that it is securely fastened and that there are no loose wires that could interfere with the device’s function. Once everything is secure, restore power to your HVAC system, which allows the smart device to power up. Follow the prompts on the thermostat to complete the initial setup, including connecting it to your Wi-Fi network.
As you move through how to install a smart thermostat, ensure that you follow any specific instructions related to the model you have chosen, such as Nest installation guidelines. With a few careful steps, you can successfully upgrade your HVAC system with a smart thermostat that not only enhances convenience but contributes to energy savings as well.
Connecting to Wi-Fi and Configuring Settings
Once your smart thermostat installation is complete, the next step involves connecting the device to your home’s Wi-Fi network. This connection is crucial for accessing advanced features and optimizing energy efficiency. Begin by downloading the corresponding app, such as the Nest app for Nest installation, from your device’s app store. Once installed, create or log into your account to proceed with the setup process.
After the app is opened, it will typically guide you through the initial configuration, which often includes selecting your Wi-Fi network and entering the password. It’s essential to ensure your Wi-Fi network is stable, as connectivity issues can disrupt the operation of your smart home energy system. Once connected, your thermostat will also download any necessary firmware updates to enhance functionality and security.
Next, the app may prompt you to link your smart thermostat with existing smart home systems, if applicable. This process can involve integrating with platforms like Amazon Alexa or Google Assistant, enabling voice control and seamless management of your energy saving thermostat from multiple devices. Following this, you’ll want to customize your settings according to your lifestyle. This includes setting preferred temperature schedules, adjusting the sensitivity of the occupancy sensors, and establishing energy-saving preferences based on when you are home or away.
For those new to smart thermostats, the app may feature tutorial prompts to assist your understanding of its capabilities. Recommendations for optimal usage are often provided, ensuring that you maximize the benefits of your HVAC upgrade. Configuring these settings not only helps to improve comfort but also actively contributes to lower energy bills, allowing you to make your smart thermostat a cornerstone of your energy efficiency strategy.
Troubleshooting Common Issues
During the smart thermostat installation process, homeowners may encounter several common issues that can hinder performance and overall satisfaction. Addressing these problems promptly can enhance the advantages of smart home energy usage. One prevalent issue is Wi-Fi connectivity failure. Since smart thermostats rely on a consistent internet connection to communicate with smartphones and other smart home devices, any interruptions can affect functionality. Ensure the thermostat is within the range of the Wi-Fi router; if it is too far, consider relocating the router or using a Wi-Fi extender to improve connectivity.
Another common concern is temperature discrepancies, where the thermostat fails to register the accurate room temperature. This can occur due to several factors, including improper placement on the wall or interference from drafts, direct sunlight, or nearby appliances that emit heat. To alleviate this issue, reposition the thermostat to a more central location in the home, away from such influences. Conducting a manual calibration may also be necessary, and specific devices come with instructions on how to perform this adjustment.
Compatibility issues are another challenge that may arise when upgrading to a smart thermostat. Some HVAC systems may not be equipped to work seamlessly with newer devices. To prevent these complications, research the compatibility of your existing HVAC system prior to purchasing a smart thermostat. Reviewing the manufacturer’s documentation for both the HVAC unit and the new smart thermostat will provide insights on whether they can integrate properly. For those who have already installed the device, consult troubleshooting guides available online that outline potential fixes or settings adjustments.
By proactively addressing these challenges, homeowners can reap the full benefits of their energy saving thermostat, ensuring a smooth transition into enhanced home automation. Having a solid understanding of how to install a smart thermostat and troubleshoot common issues will empower you to resolve problems without needing to call in a professional.
Conclusion and Encouragement
Smart thermostat installation presents an excellent opportunity for homeowners looking to enhance their home energy management. As we have discussed, these advanced devices are designed not only to optimize heating and cooling but also to contribute significantly to energy savings. By upgrading to an energy-saving thermostat, such as the Nest installation, homeowners can enjoy the dual benefits of comfort and efficiency in their living spaces.
The advantages of implementing a smart thermostat extend beyond mere savings on energy bills. With features such as remote access and automated scheduling, a DIY thermostat can provide unprecedented control over your home’s climate. These features can lead to improved house convenience, allowing you to adjust the temperature from your smartphone or tablet, ensuring your home is always at the ideal temperature when you arrive. This integration into your smart home energy system also aligns with a growing trend towards increased energy efficiency and sustainability.
For those considering an HVAC upgrade, smart thermostat installation is a recommendable step towards modernization and efficiency. The process of learning how to install a smart thermostat can be straightforward, with many resources and guides available to assist DIY enthusiasts. By embracing this technology, homeowners can take proactive steps to not only reduce their carbon footprint but also to enhance their overall living experience.
In conclusion, the benefits of installing a smart thermostat are clear and compelling. We encourage all homeowners to take this pivotal step towards better energy management and to enjoy the comfort and convenience that accompanies a well-implemented energy-saving technology. The leap into the world of smart home energy management is not just about savings; it’s about investing in a more efficient and comfortable future.